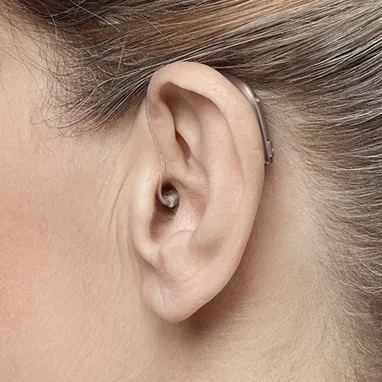
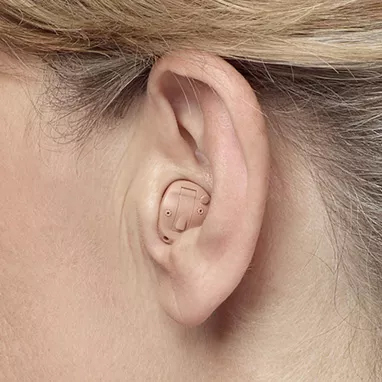
Clean Your Oticon Hearing Aid
- Wear gloves when cleaning hearing aids
- If you have behind-the-ear hearing aids, clean the hearing aid surface with wet wipes that don’t contain alcohol. This is because they are coated with a hydrophobic coating that is sensitive to alcohol
- For in-the-ear hearing aids, all kinds of wet wipes can be used for cleaning the hearing aids’ surface. The cleaning guidelines are also applicable for EduMic and ConnectClip
- An alternative to wet wipes is cleaning with a mild soap solution on a hard-twisted cotton cloth. Avoid using excess water that can enter the hearing aids
- After cleaning, discard the gloves and wash your hands carefully with soap and water or disinfect with a suitable alcohol disinfectant
- Leave your cleaned hearing aids to dry for one hour
Taking temperature in your ear
If you or someone else need to take the temperature in your ear, we recommend that you remove your hearing aid first. Having the hearing aid in the ear while taking the temperature in the ear may result in not showing the correct temperature.
Keeping your hearing aids clean
A hearing aid consists of several parts, most of which should be cleaned and maintained regularly.

How to Clean behind-the-ear hearing aids
Your ear canal produces earwax, which serves the important purpose of protecting and lubricating your ear. But wax buildup is one of the main causes for hearing aid repair, because wax clogs up the sound outlet and/or the ventilation opening, resulting in weak, distorted sound or absence of sound.
Your hearing aids are an important investment and have been designed to be both reliable and durable. Use a few minutes each day to clean them. Most hearing aids come with a filter or other device to stop wax getting into the hearing aid.
Cleaning the speaker unit and shell
As a general rule, clean your hearing aids each day with a soft, dry cloth. Make sure your hands are clean and dry before handling your aids.
The speaker unit in receiver-in-the ear hearing aids (RITE models) should be cleaned on a regular basis using a cloth to rub off any earwax. The domes (silicone tips) that cover the speaker units should not be cleaned, but instead replaced at least once a month.
Watch this video on how to clean the shell:
{mp4}oticonaltabtehow-to-clean-bte-hearing-aid-with-a-video{/mp4}

How to clean in-the-ear hearing aids
Wax build-up is one of the main reasons why hearing aids need repairing. Clean your hearing aids to ensure that they keep doing their job.
Your ear canal produces earwax, which serves the great purpose of protecting and lubricating your ear. But wax build-up is one of the main reasons why hearing aids need repairing, because wax clogs up the sound outlet and/or the ventilation opening, resulting in weak, distorted sound or absence of sound.
Your hearing aids are an important investment, and they have been designed to be both reliable and durable. Take a few minutes each day to clean them. Most hearing aids come with a filter or other device to stop wax getting into the hearing aid. Check the wax filter and replace it if necessary.
Cleaning the in-the-ear hearing aid
Use the cloth to wipe the surface of the instrument clean. Watch the instruction video on how to clean the shell.
{mp4}oticonaltacichow-to-clean-the-hearing-aid-with-a-video{/mp4}
Advice before cleaning
As a general rule, clean your hearing aids and earpieces each day with a soft, dry cloth. Make sure your hands are clean and dry before handling your aids.
The microphone inlets can easily get blocked. If you are having problems with your hearing aids, check that the microphone inlets are not blocked.
Before handling a hearing aid, make sure you hold it over a soft surface to avoid damage if you drop it
Using the MultiTool for cleaning
The MultiTool is a versatile tool that should be used to ensure the best care, cleaning and performance of your hearing aids:

Replace the brush when necessary. Simply pull it out of the tool and insert a new fresh brush. Press the new one firmly into the handle.
Article source: oticon.co.uk
